Showing posts with label embroidery. Show all posts

Sunday, September 21, 2014

Zippered pouch by Uniquely Aznique!

Need a pouch for all those little things you carry around? 

Need a quick gift that is small and cute but can pack in a lot of small items that is absolutely necessary to carry with you? 

Why not buy a pouch specially made by Uniquely Aznique! 

Check out our collection at


Wednesday, May 07, 2014

A baby bib for a special granddaughter

My hubby and I recently got an invitation to a Majlis Cukur Jambul of a very close friend’s first granddaughter.

I got the invitation about 2 weeks before the function but, other than keeping the date blocked to attend the function, I did not give it much thought otherwise, up until the day before the function.

I realised that I didn't have anything to bring or give to the granddaughter. I don’t know whether it is traditionally acceptable to bring or not to bring anything. I don’t remember attending these kinds of functions before this.

Anyway, I decided that bringing something is better than going empty handed. Nothing could go wrong by bringing something rather than nothing at all. Only trouble is, I don’t have any baby thing to bring as gifts and it was already 5.00pm when I realised that I needed or want to bring something to give to my friend’s first grandchild.

Initially I thought I’d go out and buy something. But, eventually I decided that I would make something so that it will be a special gift for a special first grandchild.

Hmm.....so, what do I do or make?

Well, for starters, I posted at the NNC group my predicament asking for suggestions as to what to bring or make. I wanted to try making something that is quick and easy as time was limited.

Then when I finally decided that I would be making a baby bib, then it was time to go in search of a pattern for a baby bib.

I did not keep any of my son’s baby bib from 10 years ago, and so, did not have a template to trace from.

I found many sites showing photos of baby bibs but most were not to my liking. Those that I like had no free patterns. More searching.....

Finally at 7.30pm, I found a pattern I like and it had a free template! Yahoo!

So, after dinner was done with, at about 8.30pm, I sat down to print out the template – I had  to tweak the pattern a bit because when I printed out the template, I felt that the opening for the neck was rather small.

I finally started sewing the pieces together at about 10.00pm. I had to trace the template, cut it out, trace it onto the interfacing (I wanted to give the bib a little bit of body), iron it onto the fabric, more cutting before I could finally put them all together.

While I am at it, I decided to make TWO instead of just one! I might as well since I was using the same template. One, I could use Em to embroider the name of the grandchild, and the other one would be just plain straightforward design.

Guess what time I completed the 2 bib? At 2.00am!

Well, I had to take a one hour break to sort out my taxes since it was already the last week to file in my taxes. I was going to be travelling a lot the following week and might not have time to do my taxes anymore except for that night.

Trust me to do my taxes at the last minute! LOL!

Anyway,  I stopped working on the bibs at 11.30pm, and continued working on it again at 12.30am!

Even though it was already 2.00am when I put in the last stitch to close the opening of the bib, I was really excited to see the end result of the bibs I made – a first for me!

Not only was it the first time ever that I made a baby bib, but it was also the first time that I put in the snap buttons all by myself with no help from anyone, except YouTube!

So, here they are...... the front...with a personalized embroidery on one of it....


The back....


Cute, huh? *wink* LOL!

I finally fell asleep at 4.00am that night...eerr......morning...as it was already passed my bedtime when I was done sewing at 2.00am and kept tossing and turning before I finally fell asleep.

Despite the last minute decision to make the bibs, a first at making the bibs, I must say that I am quite satisfied with it.

I might even consider making more bibs in the future and putting it up at Uniquely Aznique, but of course, it will have to be a design of my own.

Sunday, April 27, 2014

Uniquely Aznique making a comeback!

I have been extremely busy since the start of the new year, both at the office front and at home with my craft projects under the Uniquely Aznique label.

Ever since the start of this year, I set myself a target to try to use up as much of my stash as possible and to try to make as many items as possible, either to give away as gifts or to sell under the Uniquely Aznique label.

I think it’s time my stash works for me to bring in some extra cash. *grin* 

I think I will be needing a lot of extra cash come the end of the year when a certain purchase we made, God willing, materializes, at the end of the year.

So, this year, I set about making as many Little Missy handbags as possible as my time would permit, at the same time having so much fun playing with the colourful fabrics I had accumulated over the years and coordinating them to get just that right combination.

I finally put up my first Little Missy up for sale on the 4th of March 2014.


Guess what? 

It was snapped up within hours of being put up! Wow! I am ecstatic to say the least! LOL!

To add to my excitement, my friends from school started making orders for my personalised embroidered towels and pouches! 

Talk about taking the right step at the right time! LOL!

Syukur alhamdullilah!

The last 2 months was also my busiest time at the office front, coming home late on most days. So I ended up staying up late almost every night fulfilling the orders.

I am not complaining, of course. I enjoyed staying up working on the orders, and getting reacquainted with Em (my embroidery machine, to those who doesn't know that I call her Em) after ignoring her for almost a year!

On Friday, 21st March, I delivered, well, ok, my friend, Lela, picked up her order for 2 sets of towels containing a bath towel, hand towel and face towel in purple, and 2 single orders of bath towels in blue.


I did not get a chance to personally meet up with Lela to know if she likes my choice of design, *wink*, but she did say that her boys like them. *smile*


The following weekend, I spent fulfilling another personalised embroidered towel order for 2 bath towels in blue and a single order for a bath towel in pink.


I really enjoyed doing the embroidery works for the blue sets of towels as I really like this maritime design of an anchor and a compass. I just love the colours!

They were delivered the end of the week that I finished the order, just as requested by Aini, a friend from school.

I hope Aini will like them as much as I had enjoyed embroidering them.

My next order was for two cosmetic pouches.

Nora had ordered the pouches with personalised embroidery.


I made the pouch a little bigger than the pouch I made before shown at my blog, because I thought that a bigger pouch would be better to put in make-up as some make-up items might be taller and bigger. 


The original size of my pouch is 3 ½” x 3 ½” x 7”.  This new one is approximately 5” x 5” x 8”.


I hope Nora likes them.


Just as I was about to mail out the pouches to her, she made an order for 2 towels.


Thanks, Nora, for your second order. :)

Thanks to Aini and Lela too for your orders! 

More Little Missies will be posted here soon. 

I am just looking for the time to photograph them in good natural lighting.

Do visit again soon.

Saturday, May 25, 2013

My new toy! - Prym Mini Iron Reviewed!

The last two weeks, since recovering from the bout of high blood pressure, I needed something to do that is not too stressful, and would actually calm me down. And what could be more therapeutic than to work on my crafts.

So, last week, as I felt well enough, I decided to work on the Sunbonnet Sue blocks that my cousin, Nik Ima, ordered from me. She wanted 16 blocks in pinks and purples. She wants to turn them into a queen size quilt. Hmmmmm, wondering why she's not commissioning me to make the quilt too....... LOL! *wink*

Anyway, I set out to trace the template onto fusible web, cut up the fusible web, ironed the web onto the fabrics, cut up the fabrics into the required shape and started appliqueing them onto blocks of 10 1/2" x 10 1/2".

 The preparation alone took me a few days but I enjoyed every minute of it. It was really very therapeutic as I had fun choosing the pinks and purples for the dress, the greens for the apron and browns for the hats. Even matching the threads to the dress, the apron, the hats, the shoes and the flowers were fun!

My blood pressure was almost back to normal the whole of last week as I spent a few nights of last week working on the blocks.

However, I felt that a lot of time was wasted going from my sewing area to the utility room where the iron is located and back to the sewing area at every stage of the appliqueing process as I had to iron on the pieces of the dress, the aprons, the sleeve of the dress and the hat.

The fact that the normal iron was too big for my 5" x 7" embroidery hoop made the process even longer because I had to be really careful when ironing the pieces onto the blocks when the blocks were still in the hoop.

I had burnt the rubber mat that helps to tighten the hoop a few times already. That's when I thought about getting a mini iron which would work nicely within the size of my hoop.

I had actually bought a mini iron from Clover when I was in Singapore a few years back. However this particular iron took a long time to heat up, and even when it felt really hot to the touch, it wasn't hot enough to melt the glue on the fusible web to adhere it onto the fabric. Even leaving the iron onto the fabric for a few minutes made no difference.

I was starting to get frustrated using the iron and decided to put it aside and went back to using the standard iron. But it was clumsy using the standard iron in the hoop and trying to be extra careful when ironing in the hoop was beginning to feel like it was almost like a difficult task.

I am not about to get all stressed out trying to iron my applique pieces onto my blocks when my intention to work on the blocks was to get myself to calm down and bring my blood pressure down! LOL!

So I posted on my Quilt Group on FB to ask if anyone could recommend to me a mini iron.

Someone suggested I check out Greenie Clover on FB (http://www.facebook.com/clover.greenie).

However, Edina from Edina Crafts came to the rescue when she posted that she sells the Prym Mini Iron that is the size of the palm of your hands.

I immediately checked it out, and after doing some research on it, decided to put in an order for it.

It arrived by PosLaju at my MIL's house on Tuesday. However, I was only able to pick it up today when we went over there for breakfast.

I couldn't wait to get home to try it out!

So, after coming back from having a late lunch at Subang Parade, I came home to try it out by working on the Sunbonnet Sue block.

First, I must say that the iron is really small and it takes getting use to holding the iron on the top (Edina, pinjam photo! Thanks!) which is where the thermostat is located and also where the water reservoir is if you want to use it as a steam iron.
 
I had only just used the iron for only a few hours, but I had already accidentally touched the hot side of the iron twice as the iron sometimes flips over when placed on the surface of the cloth which I folded over several times to use as a surface to place the iron on, as it was advised in the manual that the iron should not be placed on a metal surface.

It wasn't hot enough to burn my fingers though as I had only put the thermostat to the number 2 dial instead of the number 3 dial as instructed in the manual when ironing cottons.

I also felt that the dial of the thermostat is really small and made my fingers feel clumsy trying to turn the dial each time I need to use the iron in between ironing the applique pieces because I did not want to keep the iron switched on all the time while I machine embroider the applique pieces.

This is because the whole process of embroidering each block of Sunbonnet Sue alone from start to finish, including ironing each applique piece (not including the preparation process of tracing, cutting and ironing the fusible web onto the fabric) takes between 40 to 50 minutes, sometimes even an hour when I have trouble with tangled threads.

The size was just right, though, when it came to ironing the applique pieces inside the embroidery hoop.


It looked so cute, almost like an iron that belongs in a doll house! LOL!

I suddenly went into an ironing mood frenzy so that I can play some more with the iron when I decided to iron some of the scraps from my scrap bin


I then cut them up into 2 1/2" x 2 1/2" pieces with the intention to make them into a Postage Stamp Quilt (PSQ) SOMEDAY! Heheh....LOL!


Some of my stitching friends from Needles n' Crafts have started since last year on the PSQ where as I have even yet to cut my pieces! LOL! Well, now I have, and yes, Sally, I owe you some! *blush*

By the way, did I tell you that I made myself a portable ironing board? Well, I did!

Same like the reason why I bought the Prym Mini Iron, I also made myself the portable ironing board when I realised that a lot of time was wasted going back and forth between the utility room and my sewing area.

Initially, I thought of going to a hardware shop and buying a thick plywood, have it cut to size and then covering the plywood with batting and heat resistant material. After that, I thought that I would wrap the batting and heat resistant material with fabrics.

However, when I went to the Popular Book shop last week, I found this ready made portable plywood table of about 1/2"' thick and about 17'' x 12'' in size.

Sorry, no photos because I was excited to get started on making the ironing board! LOL!

I then went to Ace Hardware and bought an ironing board cover which says that it is made out of heat resistant material. It was expensive though, but buying batting and a heat resistant material separately would probably have cost me more, I think.

I then covered the ready made portable plywood table with the ironing board cover twice over since the ironing board cover was long enough to cut in two.

I felt like a handyman using the stapler gun for the first time as I stapled the cover to the back of the plywood table! LOL!

As I wasn't happy with the way the back of the board looks like as it was uneven when I wrongly cut the cover in two, I decided to cover it again a cotton fabric I already had in my stash.

Here's the finished ironing board with my cute little Prym iron on it!


Yup! It's not pink but it was the only fabric I had which was enough to cover the board. Besides, I did not want to use my expensive cottons to cover the board.

Here's the back of the board and the sides.


I think I will have lots of fun playing with my new toy on my DIY ironing board!

The iron is small, yes, as it is the size of your palm, and yes, it is hot enough for appliqueing work, but a friend said that it does not iron clothes that well.

I think it is not meant to be used to iron clothes, but more for small craft works. But, in emergencies when you need to travel and stay at hotels that does not provide irons, I guess it should be good enough.

I like the fact that it works very well inside my embroidery hoop but I really don't like the handle to hold the iron. But, I guess once you get used to it, it shouldn't be a problem.

It also takes getting used  to turning the mini thermostat dial too. I think I should find an easier way to not have the iron switched on all the time, yet need not have to keep turning the dial to '0' in between ironing the applique pieces.

If I resolve this so called issue, I think my Prym iron and I are going to be good friends and friends for a long time! LOL! 

By the way, I have since completed 5 blocks of the Sunbonnet Sue. I have got 11 more to go!

Saturday, May 19, 2012

Postage Stamp Quilt A-Long at NNC

This year, NNC organised a big project to be done together, or, we call it the Postage Stamp Quilt A Long or PSQAL.

Almost everyone at the group are excited, and many have started planning since late last year when orders for Jelly Rolls (not the eating kind! LOL!) were made from all parts of the world.

As for me, I only started thinking and making plans for the PSQAL after the NNC Anniversary Meet was over with on the 14th of April 2012, as earlier, I was busy with my certification program, and after that, getting things ready for the Meet.

I was torn between making a full Postage Stamp Quilt or combining it with some appliqué blocks. But, my mind was made up when I was going through the April 2012 issue of the American Patchwork & Quilting magazine on the airplane on one of my working trips to Penang in late April 2012.

This particular design by Jo Morton from JOMORTONQUILTS.com just jumped right out at me! LOL! I just could not wait to get back to Kuala Lumpur and get started on my quilt! LOL!

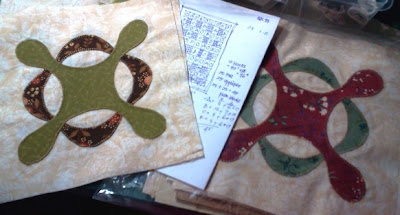
I started working on the appliqué the weekend after I came back from Penang. It looked easy, and yes, it is easy, but a lot of work goes into it – the tracing, the cutting, the ironing and the sewing of the blanket stitch. But, so far, I am pleased with the outcome.

I am making this appliqué piece to be combined with the postage stamps blocks as I am not a particular fan of monotony. I can’t bring myself to cut hundreds and hundreds of squares. I need to break down the monotony and intersperse it with something that will catch the eye and make it more interesting.

This particular quilt will be in colours of reds, browns and greens (What? No PINK? LOL! *grin*). I am using the layer cake and jelly roll from the Late Bloomers Collection for Moda which I bought from Q Gallery in Penang some time back, combined with some other collections and remnants from my previous projects.


So far, I have managed to quilt 13 blocks already. I still have another 32 more blocks to do. I need to make 45 appliqué blocks and 45 PSQ blocks. See the sketch I made on the paper? That’s my design sheet! *grin*


I am also being a little bit ambitious (shall I say, overly ambitious? LOL!) by wanting to do another quilt too while I do the PSQAL. I am hoping to make a Sunbonnet Sue quilt for the guest bedroom.

I have in fact started on the quilt using Em, my embroidery machine, the following weekend after I started on the PSQAL. Unfortunately, I could not progress fast when I had to send Em to the clinic when she hit a pin which was used to hold the fabric together, preventing it from dragging. It caused the hoop holder to jump out of her carriage.

Em has never been away from me since I brought her home 2 years ago, and it was hard being separated from her when I needed her most!

However, she’s back with me last weekend, and she now purrs like a cat as I also had her serviced while her carriage was being repaired. She sounds like new!


I am having so much fun making my Sues as I see her come to life! Oopps! I don’t think Paul is going to like that very much, and I don’t think I want Sue to actually come alive! That would be spooky! LOL!

Here’s my progress thus far.


Still a very long way to go for both quilts, but I hope to complete at least one quilt, if not both, by the end of the year. Wish me luck!

Monday, May 07, 2012

Like magic!


My mum bought a video camera recently when she was here in Kuala Lumpur. She came over to my house to spend the night, and while here, my brother asked if I could make a small pouch for the new video camera for mum as the camera bag that came with it was too big, and he can’t imagine having mum to carry it around.

When my brother first asked me to make the pouch, I drew a blank but in my head, I was trying to figure out what kind of pouch would best suit the cute little camera.

I had to stop the design process and imagining in my head when we went out for dinner to celebrate my son’s 12th birthday, but the minute we walked back into the house after dinner, and my brother asked again about the pouch, I thought I saw a light bulb in my head! LOL! I was like doing a magic trick of sorts by pulling a rabbit out of a hat, only it wasn’t a rabbit that I pulled out, but a pouch out of my bag of pouches which I had recently made for the NNC Anniversary Meet.

As if like the pouch was meant to be made for the camera, the pouch I had in hand fitted the video camera perfectly like a glove!


How cool is that? LOL!

The pouch measures approximately 6 ½ x 4 ½ inches. I think the size is just nice to fit into a handbag, and can also be used as a mini purse or handphone wallet.


The pouch is available for order at my blogshop , but you can also order them here too. It can be customized to include a monogram or with your name or the name of the person you want to gift the pouch to at an additional cost, as can be seen in the picture below with Usha's name.

Wednesday, November 03, 2010

Back to school....

Well, sort of. It’s been more than 8 months since I last went for any classes at Epal, unlike the year before where almost every other month, I would at least take a day off from work to attend classes at Epal, and I would also go to Epal every other Saturday and Sunday afternoon.


This year has been very hectic at the office front that I have not been able to take that many days leave from work to indulge in my hobbies and to pamper myself. So, last week, I decided to take 2 days off from work to coincide with my son having his exams.

I wanted to make sure that he has a proper breakfast in the morning, and I want to pick him up from school instead of having him take the bus to his grandparents’house, where my hubby would then pick him up from there at about 7.00pm. By the time they get home, it would leave him with little time to study, and we wouldn’t have time to check on him to see if he is prepared for the next day’s exam.

So, by taking leave, I can pick him up directly from school and bring him right home, giving him plenty of time to study and for us to check on him to make sure that he studies properly. His grandfather is quite strict actually, and he does make Aiman study during exam week, but, I thought since I only get to spend very little time with him lately, this is the best excuse I have to spend some extra time with him.

By taking leave during Aiman’s exam week, I also get to kill two birds with one stone, as his school only ends at 3.30pm, so, I get to attend a class at Epal while he is in school, yet be in time to pick him up from school.

Classes at Epal starts only at 10.00am and I would have leave Puchong by 2.30pm to be in time to pick him up just as his school ends for the day.


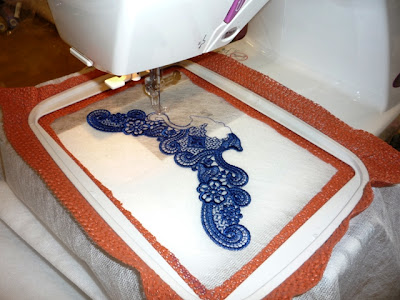
The first day I was there on Monday, 25th October, after 8 months of absence, I felt I was a little disorganised. There were many things to learn from the new kit I had just bought, but due to my being a little bit disorganised, I only managed to learn two things from the kit that day. I learned how to make a lace using dissolvable stabilizer and how to do the appliqué for Sun Bonnet Sue.


I felt very unproductive that day when it came to my crafts.

The next day, Tuesday, 26th October, I decided to get a little bit more organised. I planned on what I wanted to learn from the kit.

So, when I got to class at precisely 10.00am, I laid out all the kits that I wanted to learn that day and told the teacher that I want to try to learn at least 4 kits today before I have to leave by 2.30pm.

So, the first thing I learnt that day was to make the tissue holder. That was quite fast to do. I got that done in less than an hour.


Next, I did a cat pincushion all done in the hoop. I think this cat is kind of cute!


My 3rd project is quilting using the embroidery machine which I find very interesting as I can see lots of the quilting that I have been wanting to do I can now do that using Em. Yeah!


I am sure I can’t do all my quilting on the machine as it is not a quilting machine, but, I am sure the possibilities are plenty enough to get me excited! LOL!

My 4th project that day was something I hadn’t imagine possible – to do a sulam tekad emas using the embroidery machine! I was really amazed at the results. Just take a look! Doesn’t it look almost like the original?


I also managed to learn to do a 5th project – how to embroider motifs that has holes in them like I always see on exclusively designed baju kurung.


All this while, I thought that I would have to patiently poke the holes one by one to get the see through effects. Now I know the trick, and no, I am not going to share the trade secret with anyone! LOL! *wink*

Thursday, October 28, 2010

NNC Tea Coaster Exchange 2010

This is another long overdue posting, but , never the less, it is something that I need to post, if not for anything else, to show off the lovely tea coasters I got all the way from Italy!

Yup! My partner for this exchange is Ann, a Malaysian residing in Italy. I got from her 4 postcards showcasing the skylines of Genova where Ann is staying. Makes me want to go there someday!


She also sent me a pack of pink ribbons, which I am too `sayang’ to use! LOL! It looks lovely staying in the pack! LOL!

Of course, I must not forget the tea coasters itself! LOL!

Ann made not just the tea coasters, but also a teapot coaster too, and in my favourite colour too! They are, however, too precious to actually be used as they are made using Chinese silk fabric, and Ann had crocheted the edges to add the green colour, which has always been my favourite colour to match my favourite pink colour!

Thank you so much, Ann! Thanks for the ribbons and postcards too!

At my end, my partner to send out to is Alynn. As her favourite colour is purple, I decided to embroider her purple butterflies to make up the tea coasters.


It’s a pretty simple tea coaster. I am almost embarrassed when I compare my work to the ones the other members made for this exchange! *blush!* However, I wish Alynn still likes the tea coasters I made for her.

Sunday, October 24, 2010

Going over the bonnet with Sue!

Recently I purchased a new embroidery kit from Epal. It was a little on the expensive side, but what made me decide to buy it anyway is because it had a set of 12 Sun Bonnet Sues!

I was supposed to go to class to learn how to use the kit (the price of the kit came with 2 free classes), but I couldn’t find the time to go to class, but I also could not wait to try out the kit!

So, on Saturday, 23rd October 2010, while I keep a watchful eye over Aiman whose exam is this coming week, I worked on the Sues!

I don’t know if it is the right way to do it, but I did it anyway, using my limited knowledge on appliqué and embroidery.

I am quite pleased and excited at the results! Just take a look!


What do you think? Isn’t Sue just so cute and sweet? *sheepish grin*

Told you I was going over the bonnet with Sue! LOL!

Wednesday, October 13, 2010

More embroidered towels!

I had a couple of orders for embroidered towels, and I have been busy working on them the past few weeks. Take a look at what I have managed to come up with.


I just love seeing how the designs come to life as Em, my faithful embroidery machine, works on the designs. It’s like you are painting a picture, but instead of brushes, you use threads and needles, and it is a great feeling to see the results of your, well, rather, Em’s piece of work.


Embroidering is like an extension of my architectural training, when before this I feel great seeing how the buildings that I have designed becomes a reality, it is the same feeling too, though on a much smaller scale, and with less the stress, rather, very much less the stress of seeing a building come to life! I don’t have to deal with difficult contractors! LOL!

Any of these designs are available for orders at Uniquely Aznique, or, make a request for a special motif, and if I can get them or is available, I will surely fulfil your order.

Thank you to Rosni and Bakiah for your orders.

Sunday, October 10, 2010

HAPPY BIRTHDAY, Ma and Miki!


It’s my mum’s birthday today, 10th October 2010, or rather, 10.10.10! It is also my nephew, Tengku Mikhail, or affectionately known as Miki’s 7th birthday today!

To both my mum and Miki, HAPPY BIRTHDAY! Hope both of you have a great day today. Thanks, Ma, for everything! Hugs and kisses from the 3 of us, Nun, Azman and Aiman.

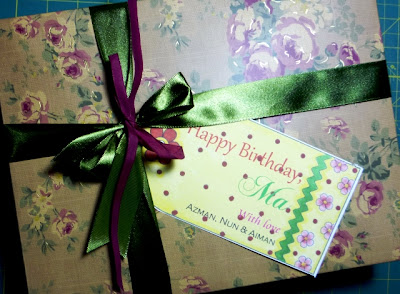
For my mum’s birthday this year, I decided to embroider her set of bath and hand towels. I was so busy with work lately that I only managed to work on it just the weekend before her birthday. I thought that the gift wouldn’t arrive in time for her birthday, but, luckily, Pos Malaysia did a great job of delivering the parcel in speed time – in 2 days!

Here’s the gift, and my mum said she loves it! Phew! Glad that she likes them!


She has untied the ribbon, but she wished that she could tie them up again the way I had tied them as she said that they no longer look presentable when untied! LOL! *grin*


It’s OK, Ma, it’s meant to be used! *smile*

Hugs, and Happy Birthday again!

Friday, September 17, 2010

Been busy embroidering......

I have been busy...well, ok, since when have I not been busy? LOL! *grin*

OK, make it, I have been EXTRA busy! LOL!

Besides work and doing the household chores, I have been quite busy lately doing embroidery work on my Em, embroidering towels as gifts and also to fulfill orders. Yeah...orders! Sounds like I have loads of orders, right? LOL!

I do, actually, though not many, but enough to keep me occupied after my son goes to bed, and while I keep my hubby company (or is that the other way around? LOL!) whenever he watches one of those war movies. I have fun playing around with the beautiful designs available online and personalising it with names for that special someone.

You know, it does make a lot of difference when you gift someone something personalised. It makes that person feel special that you actually took the trouble to have it personalised.

I made these for a friend who got married on the second day of Hari Raya.


I made these for my brother and SIL for their 17th Wedding Anniversay. HAPPY ANNIVERSARY, Nik Ai and Eli! Miss you guys!


These are for my brother, Ayis and his family. I just love the colours of the towels that he had chosen! And, I just love the motif for FATIN and FAWZAN. Cute, don't you think?


Don't you just love these personalised towels? Well, guess what? I am offering sets of embroidered towels at my blog shop - UNIQUELY AZNIQUE  (http://uniquelyaznique.blogspot.com/).

Do drop by to take a look on what I have  to offer and to get further info and more details.