Showing posts with label sewing machine. Show all posts

Wednesday, May 07, 2014

A baby bib for a special granddaughter

My hubby and I recently got an invitation to a Majlis Cukur Jambul of a very close friend’s first granddaughter.

I got the invitation about 2 weeks before the function but, other than keeping the date blocked to attend the function, I did not give it much thought otherwise, up until the day before the function.

I realised that I didn't have anything to bring or give to the granddaughter. I don’t know whether it is traditionally acceptable to bring or not to bring anything. I don’t remember attending these kinds of functions before this.

Anyway, I decided that bringing something is better than going empty handed. Nothing could go wrong by bringing something rather than nothing at all. Only trouble is, I don’t have any baby thing to bring as gifts and it was already 5.00pm when I realised that I needed or want to bring something to give to my friend’s first grandchild.

Initially I thought I’d go out and buy something. But, eventually I decided that I would make something so that it will be a special gift for a special first grandchild.

Hmm.....so, what do I do or make?

Well, for starters, I posted at the NNC group my predicament asking for suggestions as to what to bring or make. I wanted to try making something that is quick and easy as time was limited.

Then when I finally decided that I would be making a baby bib, then it was time to go in search of a pattern for a baby bib.

I did not keep any of my son’s baby bib from 10 years ago, and so, did not have a template to trace from.

I found many sites showing photos of baby bibs but most were not to my liking. Those that I like had no free patterns. More searching.....

Finally at 7.30pm, I found a pattern I like and it had a free template! Yahoo!

So, after dinner was done with, at about 8.30pm, I sat down to print out the template – I had  to tweak the pattern a bit because when I printed out the template, I felt that the opening for the neck was rather small.

I finally started sewing the pieces together at about 10.00pm. I had to trace the template, cut it out, trace it onto the interfacing (I wanted to give the bib a little bit of body), iron it onto the fabric, more cutting before I could finally put them all together.

While I am at it, I decided to make TWO instead of just one! I might as well since I was using the same template. One, I could use Em to embroider the name of the grandchild, and the other one would be just plain straightforward design.

Guess what time I completed the 2 bib? At 2.00am!

Well, I had to take a one hour break to sort out my taxes since it was already the last week to file in my taxes. I was going to be travelling a lot the following week and might not have time to do my taxes anymore except for that night.

Trust me to do my taxes at the last minute! LOL!

Anyway,  I stopped working on the bibs at 11.30pm, and continued working on it again at 12.30am!

Even though it was already 2.00am when I put in the last stitch to close the opening of the bib, I was really excited to see the end result of the bibs I made – a first for me!

Not only was it the first time ever that I made a baby bib, but it was also the first time that I put in the snap buttons all by myself with no help from anyone, except YouTube!

So, here they are...... the front...with a personalized embroidery on one of it....


The back....


Cute, huh? *wink* LOL!

I finally fell asleep at 4.00am that night...eerr......morning...as it was already passed my bedtime when I was done sewing at 2.00am and kept tossing and turning before I finally fell asleep.

Despite the last minute decision to make the bibs, a first at making the bibs, I must say that I am quite satisfied with it.

I might even consider making more bibs in the future and putting it up at Uniquely Aznique, but of course, it will have to be a design of my own.

Tuesday, March 04, 2014

Introducing the new Little Missy by Uniquely Aznique!

Do drop by my blogshop and take a look at the new Little Missy handbag by Uniquely Aznique!


I have been busy making these cute handbags since the start of the New Year with a resolution to try to reduce my present stash so that I can start buying more stash! New stash! LOL! *wink*

I enjoyed playing with colours and going through my stash to see what matches what and just simply love the colour combination that I can come up with!

The possibilities are almost endless!

I hope to make more of these Missies and put up at my blogshop. Can't wait to show you all what other colour combination I have come up with!

Do come back often!

Sunday, November 10, 2013

Sunbonnet Sue Baby Quilt

A couple of months back, a member of our local stitching group, Needles n’ Crafts, Radha, posted at the board asking if anyone is willing to make her a Sunbonnet Sue Baby Quilt which she hopes to gift it to her sister’s daughter is expecting a baby.

I jumped at the opportunity to play with Em, my embroidery machine which I have started to neglect due to my heavy travelling for work.

We discussed the details and finally agreed on only 8 blocks of the Sunbonnet Sues instead of the whole quilt being all Sues.

Radha also requested if I could add a cat in the center block as her sister loves cat.

I pondered for a while as to how to add a cat in the appliqué blocks I already have and did some sketching.

However, after a while, I felt that my cat did not turn out like it was going to look like a cat, and proposed back to Radha if I could instead embroider a Sunbonnet Sue which already has a cat in it which I already happen to have a pattern for it.

Luckily Radha agreed.

Next, I sat down to design a layout of the quilt to make sure that Radha would be happy with it. I gave her 3 options and when she finally settled for one of it, I immediately got started on it as that very weekend, I had some free  time.

I did not want to put off doing it to later, knowing how hectic my work schedule could sometimes be and sometimes even unpredictable where I would have to travel within only 2 days notice.

I am glad I started when I did and got as far as appliquéing and embroidering up to 6 blocks that weekend, because after that, I travelled non-stop for 2 weeks.


The next time I worked on it, I stayed up late to finish off the 2 remaining blocks and started to cut up my fabrics, bought earlier in the day at Kelvins’s one fine Saturday, to make up the rest of quilt.

Radha had specified that she wanted the quilt to be in pink.

That being my favourite colour, I would think that I would have no problem choosing just the right fabric for it.

Wrong!! LOL!

I brought along my sketch and the finished Sunbonnet Sue blocks to Kelvin’s shop so that I can match the pinks to my Sues, and my oh my, does Kelvin have many shades of pinks! LOL!

I was going cross-eyed trying to choose which pink suits the quilt best.

It was hard choosing the many flowery pinks, as in my head, I thought that maybe Kelvin would carry some pink baby motifs, and I would just choose that.

However, the choice of baby motifs in pink was limited at Kelvin’s shop. I did, however, managed to get some very lovely small flowery prints of pinks which I think is really sweet.

For the backing, I managed to get a lovely ABC fabric bought from Gill’s Quilt Gallery in Bangsar, which I felt just matched the pink and green motifs which I intended to do for the front.

It was fast putting the quilt together. It took me only a week, working on it every spare night I wasn’t travelling for work. But the next stage of the quilt, I felt like it was taking me ages to get it done.

For some of you advanced quilters out there might find doing the quilting part a breeze. But for me, it was the biggest challenge of doing a quilt.

I thought that I’d take a short cut and get Em to help me with the quilting part.

I had bought a few quilt patterns online and tried it on a small practice piece and it turned out almost perfect!


I was happy with the result and set about to quilt embroidery the whole quilt with Em’s help. Easy peasy, right?

Wrong again!

Em refused to quilt embroider the huge (huge by Em’s standard) quilt. The quilt kept coming off its hoop and I would end up with jumped stitches.

After several attempts to get Em to quilt embroider, I started to get all flustered and frustrated. I decided that this is not going to work. Em is kicking up a fuss and we don’t seem to see eye to eye on this project.

I decided to let Em off the hook and started to look for other ways to quilt the baby quilt.

I could have just done some simple stippling quilting effect all over the quilt, and I should be done in about 2 weeks, but I am not one to just do something straight forward and felt that, after doing quilting for a number of years, I should start progressing to the next level, and that is to try to do other quilting designs, other than just stippling.

I looked to the internet for ideas.

I spent every spare time I had, googling for quilting motifs, hoping to find just the right motifs suited for my level of expertise. Oopps! I cannot even be considered an expert!

In my search for just that right quilting motif, it brought me to Pinterest.

I could spend hours going through Pinterest!

I came up with loads of quilting designs which I really love. Alas, most of them are for more advanced quilters.

I was beginning to feel the pressure when my time was running out as Radha asked if I could get the quilt done by November, and I still could not settle on a quilt motif which I think I am confident enough to do. My travelling all the time did not help either.

Finally, after many hours of going through Pinterest, I decided on a few motifs which I think I can manage.

Once the motifs were decided, it was time to do some practice pieces.

However, since I was still busy travelling; there was no way I could do a practice piece. So, I did the next best thing.

In between boring meetings, and on my flights in the plane and at airport lounges, or anytime I find that I have extra time on my hands waiting to get on the plane, for a meeting to start, even while I was watching TV, I'd be doodling, trying to find what works best for my quilting level and what suits the baby quilt best.


I finally settled for 4 different quilting designs.

I can’t say I know the names of any of the quilting designs that I have chosen as they all came from different sources.

You can go to my Pinterest to see the pins and track the designs from there, if you like.   

Trying to quilt on a sewing machine with a small throat was another challenge I had to face.

For a while, I ended up having a sore shoulder from not sitting properly. I finally decided to move my sewing machine to another table where I would have more space to the front of the machine, and it worked.

I was able to quilt for many hours on the baby quilt, making frequent stops in between for some water to drink as adviced by many of my quilting friends and from reading and watching YouTubes.

I can’t actually recall how many hours it took me to finish the quilting, but, despite all the sore shoulders I had to endure, I enjoyed every stitch I put into the quilt.


I had so much fun trying out the new quilting motifs.

As if quilting 4 new designs wasn't challenging enough, I decided to also try out making a scalloped border instead of the normal straight edge border. 

This is the first time I am making a scalloped edge for a quilt.

It took me several sketching and markings on the quilt to finally get all the scallops at the 4 corners to match up.

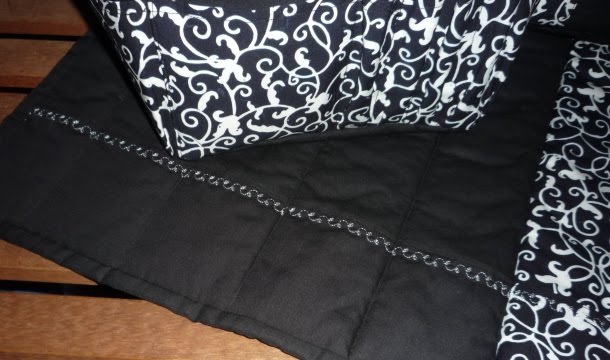
After having to go through a tough time doing up the scallop edge, I decided to just settle for a simple straight line quilting for the border.

Despite it being simple, I think the simplicity of a straight line quilt gave the border the depth and dimension I wanted.


I like the way it turned out. 

Next came the binding.

It was also a first for me to try to bind a scalloped edge and I had to tune in to several Youtube videos before I was confident enough to give it a go.


I think I did OK. I like the way the binding turned out actually.

I decided that the binding should be yellow instead of pink or green to add interest to the quilt. I thought that it would make the quilt 'pop'!


Did it, when you first saw the quilt?

I think the yellow binding picked up the yellow ABCs on the backing very well, and on the front, it brought out the yellow dress on the middle row of Sues. 


This baby quilt had given me the opportunity to try out so many new things and something that I think I’d never try out if not for this quilt.


Thanks, Radha, for giving me this opportunity to make this quilt for you. Those sore shoulders were worth every pain I had to endure! LOL!

I hope you and your sister and niece will be able to enjoy the quilt.


Another product by Uniquely Aznique!

Tuesday, August 21, 2012

How things have changed.....

Last Saturday, 11 August 2012, after buying the baking things at Bake with Yen in Puchong in preparation to bake cakes for the coming Raya, I dropped by Epal, the shop cum sewing class where I bought my 2 sewing machines and learned to make so many bags, quilts, and clothes, just to see what’s new.

A lot have changed since the last time I dropped by there. For one, all the teachers who taught me sewing have all left and gone to greener pastures, or, gotten married, gotten pregnant, and left to concentrate in raising a family. Only the Branch Manager is still around, but when I dropped by there that day, she was on leave. She had gone back to Sabah to see her grandmother who was ill. So everyone at the center that day was unfamiliar to me. *sad*

As I walked into the shop, I was greeted by this huge stand right in front of the shop which hung many new bag designs. I inquired if I could buy some of the patterns for the bags, but was told that they don’t sell the patterns, but instead, I would have to buy the fabrics from them, and they would give me the patterns when I come in for classes to learn how to make the bags. I can’t just buy the fabric and the patterns.

Now when can I find the time to come in for classes?

4 years ago when I bought my first sewing machine from them, I was given a year of free classes to come and learn any or all of the 24 projects offered for that year. I managed to learn 11 projects for that first year by coming in on Saturday afternoons after Aiman finishes his Art classes at Bangsar Village I and on Sunday afternoons, after the weekly maid leaves, and lunch is done with. I would come on Sundays with Aiman in tow. He would bring a toy, his PSP and his workbooks, and he would sit beside me as I take my lessons. My hubby would go to the gym.

On certain Sundays, my hubby would take Aiman with him shopping so that I may stay in class longer, as sometimes, Aiman can get restless and would want to go home early.

There were days too that I would take a few days off in a month from work just so that I can come in for classes. During those days, I would come in at 10.00am and leave by 2.30 pm, in time for me to pick up Aiman from school, bring him home, or take him shopping. We would spend the rest of the evening reading, watching TV or Aiman would be doing his homework and I would work on my crafts. On most of those evenings, I would also cook dinner.

But now, I can’t do that anymore. I have become so busy, extremely busy!  

How did I become so busy?

Our weekends now are filled up to the rim with Aiman’s activities – sending him for his football practice and to his tuition, making sure he does his home work, making sure he does his cat chores and washes his shoes, etc.; doing the household chores, supervising the weekly maid and many other commitments which we don’t know how we got ourselves into, or, we now have more family commitments, not just with Aiman, but also our other family members, our parents especially.

As I left the shop that day, driving back home, my tears flowed. I suddenly realised how we have changed, how our lifestyles have changed, and most importantly, how much time I have missed and lost seeing Aiman growing up.

Aiman is 12 this year, and had just gotten his IC, another major milestone in his life. I realised how much I have missed a major portion of his growing up years as I focus on work and my career

I can’t take leave from work as easily as I use to be able to. Even when I do get a chance to take leave, I end up having to cancel some of the leave at the very last minute. This year alone, I have had to cancel my leave 7 times already, not to mention the number of times too that when I am on MC, but would still have to come in for work to settle urgent matters.

On most days that I am on leave too, I would be on the phone for most part of the morning with someone from the office to settle urgent matters.

Why can’t I delegate my work? I do delegate my work where possible, but there are certain tasks or assignments that cannot be delegated. It’s hard for anyone to understand. Most people would say that I am bad at managing because I want to do everything myself. I am a perfectionist, and when a task cannot be done properly, and I end up having to correct the task delegated to someone else, I might as well do it myself.

I have 3 reliable senior officers, and they have already taken a big load off my shoulders, but, like I said, there are still some tasks that simply cannot be delegated. I take all of my work seriously and with passion, and though I may sometimes sound like I am complaining, I am actually enjoying my work, but it’s the stress of trying to meet datelines, trying to pacify angry clients, and crisis at the work place that sometimes take a toll on me.

During these times, I pray to God to help me and give me guidance on what to do and to give me strength to face the hardest and most difficult hurdle. Praying calms me down as I know that Allah is listening and will help me do the right thing.

I could no longer get back the time I have lost seeing Aiman grow up. I will just have to console myself in the hope that I will still be able to at least still be here for him, God willing, when he is all grown up, gone to college, get married and have kids and have a great career.

I am glad that at least his grandmother and grandfather were able to be there with him when we could not. I am glad that my MIL insisted that we send Aiman to her house everyday instead of to a nursery even when we had a maid so that she could supervise him and the maid. At least a family member is always there for him during those early crucial years. I have a lot to thank both my in-laws for.

Thanks, Mak and Ayah!

I hope to be there for him as he steps into another major milestone in his life when he starts secondary school next year, insyaAllah.

I may have changed in a lot of ways, but hopefully for the better, and hopefully wiser and more matured. I am thankful for all that God has given me. I am blessed, and I hope that my family and I will always be safe under God’s guidance. Amin.

Sunday, December 18, 2011

He takes home the medal; she ends up making more bags! *grin*

Yup! That’s what happened last year when my hubby took part in the Penang International Bridge Run, and it’s been repeated again this year, not that I am complaining, actually. LOL! *grin*

I am very happy to blog report that I successfully managed to learn to make 3 bags during my 2 day bag making class from the 19th to the 20th of November. The bags this time around, except for one, aren’t that complicated as last year’s bags as I think I was a little bit unadventurous this time around. No, make that I was being more realistic this time around as I know I would not have that much time to spend finishing the bags if I don’t complete them during the class once I am back in Kuala Lumpur as I will be having my nose grinded into my Assignments right up until March next year, God willing.

I had made the purchase for the templates and gotten all the preliminary instructions from Corine during one of my earlier working trips to Penang about more than 2 months ago when I had some extra time after my meetings, before flying back to Kuala Lumpur.

By purchasing the templates and getting the instructions earlier, I would be able to make some early preparations before the class like have the templates all cut out, the interfacing all ironed onto the fabrics, and have them all cut out ready to be put together during the actual bag making class. This way, I get to complete making the bag faster, and completing the bags faster equates more bags that can be made in the same amount of time! LOL!

However, as it turned out, I didn’t get to have all the preparations ready before the class as I fell sick just days before the trip to Penang (talk about last minute preparations! LOL!) , and besides, I was busy working on my Assignments, which I think made me fall sick from all the stress of working on the paper. This bag making class would be just perfect as a stress buster.

But all was not lost though as I still managed to prepare at least one bag before the class, and I had planned to finish the preparations for the other 2 bags in the hotel room the day before the class. Talk about squeezing in time at the last minute! LOL!

Anyway, on the first day of class, I did not manage to finish even a single bag. Even my hubby found that odd. I blame it on my lack of efficiency as it had been quite some time since I last did any sewing or crafting due to heavy work load at the office. It took me some time to get back into rhythm of things.

Also, I had another new and exciting thing introduced to me by Corine on the 1st day of class. Corine let me use her latest addition to her family of sewing machines – a brand new Brother Innovis QC 1000!


It is one awesome machine, and I think I might have just fallen in love with it! LOL!

The Innovis QC 1000, to me, is a cross between the BERNINA and the JANOME, but at slightly more than half the cost of the BERNINA. That, to me, is affordable as it is almost the price of my JANOME. Eerr…..no, I am not buying it, BUT, if ever I want to get another sewing machine, it just might be the BROTHER. *grin*

One of the things I like about this machine is its large touch-screen LCD.


Also, I like that all the basic feet are all kept within the machine, even the bobbins too.


No more having to lug around the box of feet and bobbins to class, as, I have, at numerous occasions, ended up not able to do any sewing in class when I accidentally left behind my box of feet and accessories. No chance of that happening with this machine, except if you buy more extra foot. But then, they will be foot you won’t usually use all the time for the basic sewing.

Another thing I like about this machine is that I can make adjustments of the needle to every 0.5mm, and the needle threader is just awesome!


I thought that the needle threader on my Janome was awesome already, but this machine’s needle threader is even more awesome as the thread clicks very easily into the needle.

OK, enough about the machine. Yup! I am in love with this machine alright! LOL!

Back to my bags, I left Corine’s hut on the first day of class feeling a little bit incomplete when I had nothing to show of what I did the whole day, though I had fun playing with the Innovis.

I left with loads of homework though. I had to get some hand stitching done in order for me to move on to the next step. I did not want to spend time hand stitching in class as I could do that in the hotel room. I would rather spend my time in class doing all the machine sewing and the cutting where I would need Corine’s guidance to proceed.

I slept at midnight that first night, doing my homework – hand stitching and ironing the interfacing; and slept just as my hubby got up to get ready for his run.

Early the next morning, I took the cab with my son to Corine’s house, leaving my hubby to rest in the hotel room after his run to recuperate.

This time, I was the only student for the day (the day before, there were a hive of activities with about 4-5 students taking classes at the same time), thus allowing me to be able to work faster as Corine also helped me with some of the hand stitching that needed to be done.

When the class ended at 6.30pm, I was about ¾ done on the One Nighter or overnight travelling bag, ½ done on the Xora bag and with only the hand stitching and the bag handle to sew on the Omra bag.

Here’s a photo of the inside of the Xora bag which I am in the midst of hand stitching.


I just love these clips I bought from Corine. It takes away all the pricking from the pins which is almost certain I will get when I use pins to baste for hand stitching.

I completed the One Nighter bag in the hotel room the next day after breakfast.

 
What do you think?

When I first saw the sample bag at Corine’s, I thought it looked more like a diaper bag. But when I completed my own version, it no longer looks like a diaper bag. But definitely, it won’t be my One Nighter bag either, what with all my toiletries, make-up bag, telekung, and at least one change of clothes to pack, this bag certainly won’t be able to fit in all those! LOL!

Instead, I think this bag would make a very nice document bag. What do you think?

I will put up photos of the completed Omra Bag and the Xora bag when it is fully completed, which, for now, I wouldn’t know when that will be. Hopefully next year after March, or,maybe, just maybe, earlier! *wink*

Monday, October 11, 2010

Sleeping at the racing circuit

My son had been asking me to make a set of pillow and bolster case for him from the fabric he had chosen at Kelvin’s some time back, but I kept putting it off as I had some orders to fulfil. However, this weekend, I was feeling a little bit unsettled and fickle minded. My son wasn’t in the best of health. He has been coughing since Friday, and that got me worried and anxious. I could not concentrate to do anything, yet, I needed to do something to take my mind off my worries so that I don’t end up getting my hubby stressed out with my overly anxious mood.

I was itching to make a bag, but that would need more concentration, which I wasn’t in the right mind to do. Then I remembered the pillow and bolster case which my son had wanted me to do. I thought this would be just the right time, him being sick and all. Maybe the pillow and bolster case would perk up his mood and make him feel better and get him to recover from his coughing faster.

I set about making the pillow and bolster case just before lunch on Sunday, 10 October 2010 and finished it at 5.30pm the same day. It was a straight forward pillow and bolster case. There were no frills, and so it was quick to do.

My son loves them, and as you can see from the photo, he got himself immediately comfortable with the pillows.


Here’s a close up of the motif on the pillows. He’s definitely going racing in his dream every night from now on, for sure! LOL! *wink*

Sunday, September 19, 2010

Doing piping is now a breeze!

I discovered this awesome and wonderful foot when I was learning to do the Saddle bag from Corine about two months ago.


I was taught to make the bag on the BERNINA, and it comes with quite a number of feet, and one of it is this wonderful feet they call it foot number 10, or, 30, can’t quite remember. But, anyway, it makes making piping a breeze and almost perfect like what you get if you buy readymade piping.

All the while I was taking the class; I wondered why the JANOME does not have such a foot. Then Leena, a friend, suggested that I asked the dealer where I bought the machine from. She was sure that the Janome would have one too, since the Janome is also a big brand name in the sewing world.

I did just that, but, unfortunately, not only do they not carry it, despite them being the sole JANOME distributor in Malaysia, they don’t even know anything about what the foot is all about. *sigh*

I asked if I could have it ordered if they can find out from JANOME international, but they seem lost as to what I was talking about. Bummer! I finally gave up!

So, I did the next best thing – I went online in search of it. I found it at several online shops but many wouldn’t ship to Malaysia. Another bummer!

I did not give up and kept searching for it over several days at night after Aiman was settled in bed. Can’t concentrate to buy anything online when I have a 10 year old son hovering over you, you know. LOL! *grin*

I finally found it at eBay! This eBay seller, David, was very helpful, and it was nice to know that he has shipped many items to Malaysia before. That put my mind at ease.

I immediately put an order for the foot and a couple of other foot too – the top stitch foot which I also learned how to use while doing the Saddle bag from Corine, and the curving foot. I have yet to know how to use the curving feet though. For some reason, the foot did not sit nicely on my Janome.

The first time I made my first piping using my own piping foot, I was like a child who just got her favourite lollipop! I just wanted to show it off to someone! LOL! Alas, it was already late at night when I did my first piping! LOL! *grin*

Ever since I got the foot, I have been making quite a number of bags with piping, and I just love the way the piping gives that value added detail to the bags, other than the piping looking so nice and almost perfect!

Just keep a lookout for more bags with pipings from Uniquely Aznique!

Saturday, July 03, 2010

Uniquely Kenari Villa!

My mum had just ventured into a business to run a guesthouse (you can read it here), and we, as in my mum herself; of course, all my siblings, cousins, relatives etc are all excited about it. I wrote about it here in my blog to promote the guesthouse, and my brothers helped set up a webpage for it. You can read about it here.

I wanted to do something for my mum’s guesthouse which will make the guesthouse special, and not like any other guesthouses you get in the country. I wanted it to have something more significant which people will know that it is uniquely Kenari Villa.

So, after much thought and ‘discussion’with Em (you know, my embroidery machine, Em? Yes, we discuss! LOL!), we decided that specially embroidered towels would make the guesthouse special.

I set about looking for some reasonably priced towels as I don’t want it to be too expensive that it will tempt guest into absconding with them as souvenirs *wink*, but neither do I want something cheap that they can’t even absorb enough water to dry you up. *grin*

I finally found some, but I could not get them in enough numbers of the same colour, and so, decided to go with 2 different colours – cream and peach. I had to do some sort of designing, though not much can be done as I do not have the embroidery design software (maybe it’s time that I get one? *wink*), and here are the results.

What do you think?

The fonts were from the machine itself, while the tendrils were part of my collection of designs that I have been buying online from Embroidery Library ever since I had Em.

I just love the fonts. I am glad that the machine came with it.

I presented the towels to my mum when we met up at a cousin’s daughter’s wedding last weekend, and I can tell that she is excited about it too! Right, Ma? *wink*

Ma, I wish you all the best in your new found business venture, and I hope that the towels are able to add that little touch of uniqueness to the guesthouse. Hugs!

Sunday, May 02, 2010

A pouch and biscornu for Diane

After completing the bag and pouch for Diane, I decided to do something extra for Diane in colours to match both the items, or rather, in colours that I know are her favourite - brown, blue and green. I decided to make her a biscornu and a pouch using Em, which lately, I have neglected to use as I have been so busy with work and making bags.


A very simple biscornu and pouch, but I hope that Diane will find both items useful and handy to use.

Thursday, April 22, 2010

A set in black

They are finally completed – the bags for Idah!

I had actually completed the two bags that my hubby’s cousin, Idah, wanted me to make for her almost more than a month ago. But, while in Mecca doing her umrah, Idah smsed me asking me if I could make her a matching sejadah (praying mat).

I had set out to do it about midway while doing the bags for Diane but I had to stop when I ran out of the black cottons. I had to wait for a Friday when I could go out during my long lunch hour break to buy the cottons, and I was only able to do it two Fridays ago.

So, two Saturdays ago, after coming back from Aiman’s usual Saturday classes, I set out to work on the sejadah, and worked on it through Sunday, 11th April 2010. I thought I could finish it by that weekend, but, as I had brought back work home, I spent Sunday evening going through my piles of letters. On Monday and Tuesday, 12th and 13th April, I slept very early after a very stressful day at work. On Wednesady, I had to bring back work home again.

I was in Penang on Thursday and Friday.

It was only on Saturday, 17th April, while watching the AF concert, that I could finally find time to pick up the sejadah again to work on it, and I finally completed it on Sunday morning.

So, here is the full set – a big bag for putting in the praying garments (telekung), a matching pouch and the sejadah.


The big bag is smaller than the sample bag I had made earlier as Idah preferred it to be 2”smaller than the one I showed her.


As for the pouch, I got the idea from Idah’s very own pouch that she had bought at one of the departmental stores. She had wanted a similar one but in matching fabrics to the big bag.


I am afraid the photo did not do justice to the time and effort put into making all the little pockets, but there are pockets to put in 4 pens/pencils, a plce to put in a small a foldable shopping bag, a small note book and other little gadgets which we ladies tend to carry in our handbags! LOL

It was quite a challenge doing up this little pouch as it had many pockets.

It might be small, but I had to spend many more hours making it compared to the time I had spent making the big bag. It had a lot more details and quite a lot of time was spent making sure that everything matched up and looked the way it should.

It took a lot of planning before the actual work of sewing it could be done, but I have learnt some new things on making this kind of pouch. I’ll probably be making a similar one for Zai who had asked that I make a pouch for her and a craft bag. That’s my next project! *wink*

As for the sejadah, it was quite easy to make as it was like making a baby quilt. I had fun doing the embroidery to indicate the top of the sejadah.


I like the effects of the embroidery as it gave the sejadah a sweet touch to it. I just hope that Idah’s likes it as I think that even with the sweet touch of embroidery, the sejadah still matched the bag which Idah wanted them to have a corporate look. The embroidery wasn’t too overpowering.

Here's the whole set with the sejadah all nicely folded to show off the Aznique label. *wink*


I hope to hand deliver the set to Idah this weekend. I just hope that Idah will like what she sees.

Tuesday, April 06, 2010

Taking over the dining room!

This is nothing new. Ask any of my stitching friends and they will tell you that it is a universal problem. LOL!

I think my hubby has given up on telling me not to take over the whole house! LOL! He kept saying that, for as long as he has space to do his work, read his books and be able to watch TV without having to step or avoid any of my stuff, he’s happy! LOL!

He reminds me, from time to time, that I have a whole craft room, yet my things are everywhere! LOL!

Well, when I was only doing cross stitch, crocheting, scrapbooking and making cards, the space in the craft room was sufficient. But, when I started making bags and quilts, I realised that my 10’x 11’craft room is no longer enough! LOL!

I needed space to lay out my fabrics and battings, and since my craft room is an L-shape, I kept banging onto the shelves and my 3 sewing machines just couldn’t all fit into the room. So, I slowly started inching my way into the dining room! LOL!

I also prefer to work downstairs at the dining room because I want to be as close as possible to where my hubby is watching TV, and the dining room is just perfect! The dining table is also the place where my son does his homework and workbook, and so, I can keep an eye on him while I work on my bags or quilts. It might not be quality time, but, at least we are together, instead of me being cooped up all alone in the craft room, while hubby watches late night movies on TV and I get to properly supervise my son as he does his work. I also get to multi-task as I can get the cooking going while my embroidery machine is running. *grin*

I did some reorganising of the dining room last weekend, and re-oriented the dining table to make more room for my son to do his work and my hubby can bring his laptop down should he wants to do some work and still keep my company as I work on my projects.


When before this I would be sharing the dining table with my son to do my cutting, sometimes eating into his work space with my fabrics and rulers, this time, I created some sort of a nook for measuring and cutting, which is away from the dining table.


My son likes this new layout, and my hubby is happy that things are a little bit neater and more organised. I now have a proper place for my rulers which I bought at Sakura, and had placed it at the top of my cutting board. Makes looking for my rulers easier now, when before this, I kept losing them under all the fabrics and my son’s books! LOL!

I also went out to buy some plastic containers to organise my big collection of embroidery threads, and I like it that now I can see all the colours that I have at a glance.


I also have less problems with my threads getting entangled as they are now separated by colours. I don’t have all 40 threads getting entangled together, but, instead now only the threads that are put in the same container gets entangled. It’s less of a headache. Now I just need to find a way on how to get my threads to tangle less. Any suggestions?

Here’s the corner for my Janome sewing machine.


I still need to organise the back portion of the machine where I had just dumped some of my UFOs. I am still thinking how to do it.

On the dining table, I still have my embroidery machine, but at least it looks neater and I have direct view of my son as he does his work.


I hope this arrangement stays neat for as long as possible, though you and I know that that is almost impossible! LOL! But, I am sure my hubby thinks otherwise! LOL!

Thanks for your patience, Dia! Hugs!

Saturday, March 27, 2010

Two bags completed at last!!

Well, actually, I completed both these bags like more than a month or so ago, but I could not find time to blog about it. Rather, I kept forgetting to blog about it. Too many things are happening all at the same time.

Anyway, these two bags that I meant are the bags I learnt from Corine when she came to teach us the bags on 18th January. Yup! More than 2 months ago!

I completed the green two-way bag earlier, but decided not to blog on it until I completed the red hexagon bag. I only completed the red hexagon bag just slightly before I got the special request from Idah, my hubby’s cousin.

I love both bags as they both have their own unique use for them.

I can use the two-way bag either as a normal handbag or I could use it to carry my documents to work. It professional looking enough.


This bag has got two different handles. I can either carry it or sling it over my shoulders, thus the name, "Two-way bag".

As for the red hexagon bag, it is really cute! I just love the fabrics! The kit actually came with pink fabrics, but, as I had already made 2 bags in pink when I was in Penang for the Craft Retreat, I decided to swap the pink fabrics for these red ones which are actually leftovers from the bag I made for my mum sometime last year as a birthday cum Raya Gift to my mum.


It’s a good bag if you want to keep it simple. The only drawback is that it has no zip to it, making it easy for things to fall out of it, or for someone to actually dip into it.


I certainly can’t bring it shopping, but it looks good to bring it to smart casual or semi-formal functions.

I love the red leather handles with the strawberry ends to it, but it was tough sewing down the handles to the bag. I kept pricking my fingers as I kept poking the needle at the wrong place! LOL! I have got to learn how to sew these kinds of handless properly! LOL!